four-countdown layout
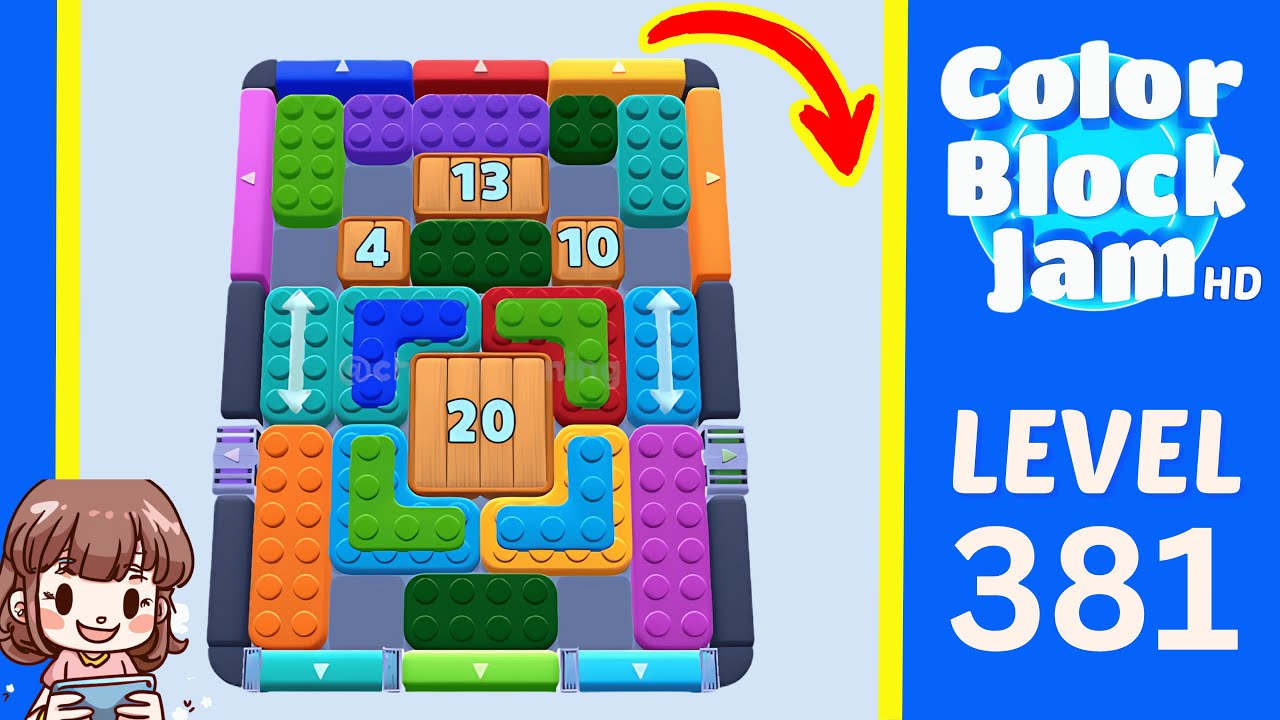
This solution matches the Level 381 board with wooden countdowns 13 at the top, 4 on the left, 10 on the right, and 20 in the center. Clear matched blocks in a controlled chain so the left, right, top, and center sections open in that order. The first run of the linked walkthrough reaches the level-complete panel at about 1:43.
20 timestamped steps
Use each checkpoint to confirm that your board still matches the walkthrough.
Use these moments to confirm that your board still matches before continuing.
| Time | What to confirm |
|---|---|
| 0:05 | The walkthrough opens on Level 381 with wooden countdowns 13 at the top, 4 on the left, 10 on the right, and 20 in the center. |
| 0:14 | Two quick cyan exits reduce the four countdowns to 11, 2, 8, and 18 by about 0:14. |
| 0:22 | The left countdown section opens after the early cyan, purple, and blue exits; the remaining counters read 8, 5, and 15 at about 0:22. |
| 0:55 | A dark-green block leaves through the right gate at about 0:55, opening the right countdown section and revealing the yellow arrow block. |
| 1:06 | The top section opens after the thirteenth matched exit, and the remaining center countdown then falls from 7 to 0 before the final four blocks are released. |
| 1:43 | The first solution run reaches the level-complete panel at about 1:43; the later footage is a replay of the same solve. |
Checkpoint: By about 0:14, both cyan pieces are gone and the counters read 11, 2, 8, and 18.
Watch at 0:14Checkpoint: The cyan block clears at about 0:19 and the counters read 10, 1, 7, and 17.
Watch at 0:19Checkpoint: Purple clears at about 0:21, removing the last count from the left wooden section.
Watch at 0:21Checkpoint: Blue clears at about 0:22; the left section is open and the remaining counters read 8, 5, and 15.
Watch at 0:22Checkpoint: The second purple block clears at about 0:32 and the counters read 7, 4, and 14.
Watch at 0:32Checkpoint: The cyan L clears at about 0:34 and the counters read 6, 3, and 13.
Watch at 0:34Checkpoint: Blue clears at about 0:38 and the counters read 5, 2, and 12.
Watch at 0:38Checkpoint: Green clears at about 0:46 and the counters read 4, 1, and 11.
Watch at 0:46Checkpoint: The dark-green bar clears at about 0:55, opening the right section and revealing the yellow arrow block; the other counters read 3 and 10.
Watch at 0:55Checkpoint: Yellow clears at about 0:58 and the remaining counters read 2 and 9.
Watch at 0:58Checkpoint: The green exit at about 1:02 leaves the top counter at 1 and the center counter at 8.
Watch at 1:02Checkpoint: The cyan exit at about 1:04 removes the final top count; only the center section remains, showing 7.
Watch at 1:04Checkpoint: The yellow-bordered L clears at about 1:15 and the center countdown reads 6.
Watch at 1:15Checkpoint: Cyan clears at about 1:19 and the center countdown reads 5.
Watch at 1:19Checkpoint: Green clears at about 1:21 and the center countdown reads 4.
Watch at 1:21Checkpoint: Blue-cyan clears at about 1:22 and the center countdown reads 3.
Watch at 1:22Checkpoint: Red clears at about 1:27 and the center countdown reads 2.
Watch at 1:27Checkpoint: Orange clears at about 1:33 and the center countdown reads 1.
Watch at 1:33Checkpoint: Green clears at about 1:35, opening the center section and releasing the concealed cyan blocks.
Watch at 1:35Checkpoint: The last pink block leaves at about 1:42 and the level-complete panel appears at about 1:43.
Watch at 1:38Each row links a visible gameplay fact to the walkthrough frame used to check it.
| Fact | Source role | Timestamp | Checked |
|---|---|---|---|
| The walkthrough opens on Level 381 with wooden countdowns 13 at the top, 4 on the left, 10 on the right, and 20 in the center. | CherieGaming walkthrough evidence | 0:05 | July 15, 2026 |
| Two quick cyan exits reduce the four countdowns to 11, 2, 8, and 18 by about 0:14. | CherieGaming walkthrough evidence | 0:14 | July 15, 2026 |
| The left countdown section opens after the early cyan, purple, and blue exits; the remaining counters read 8, 5, and 15 at about 0:22. | CherieGaming walkthrough evidence | 0:22 | July 15, 2026 |
| A dark-green block leaves through the right gate at about 0:55, opening the right countdown section and revealing the yellow arrow block. | CherieGaming walkthrough evidence | 0:55 | July 15, 2026 |
| The top section opens after the thirteenth matched exit, and the remaining center countdown then falls from 7 to 0 before the final four blocks are released. | CherieGaming walkthrough evidence | 1:06 | July 15, 2026 |
| The top section opens after the thirteenth matched exit, and the remaining center countdown then falls from 7 to 0 before the final four blocks are released. | CherieGaming walkthrough evidence | 1:35 | July 15, 2026 |
| The first solution run reaches the level-complete panel at about 1:43; the later footage is a replay of the same solve. | CherieGaming walkthrough evidence | 1:43 | July 15, 2026 |
It covers the board with wooden countdowns 13 at the top, 4 on the left, 10 on the right, and 20 in the center.
Yes. The first CherieGaming run reaches the level-complete panel at about 1:43. The remainder of the video repeats the same solution.
The left section opens first, followed by the right and top sections. The center countdown then reaches zero and releases the final four blocks.
This walkthrough matches the Level 381 board with countdowns 13 at the top, 4 on the left, 10 on the right, and 20 in the center. If your values or opening block positions differ, use the Wrong Level tool instead of forcing this sequence.
Wrong level?