central translucent cyan area, top counters 3 and 7, bottom counters 9 and 11, and lower bomb pieces starting at 20
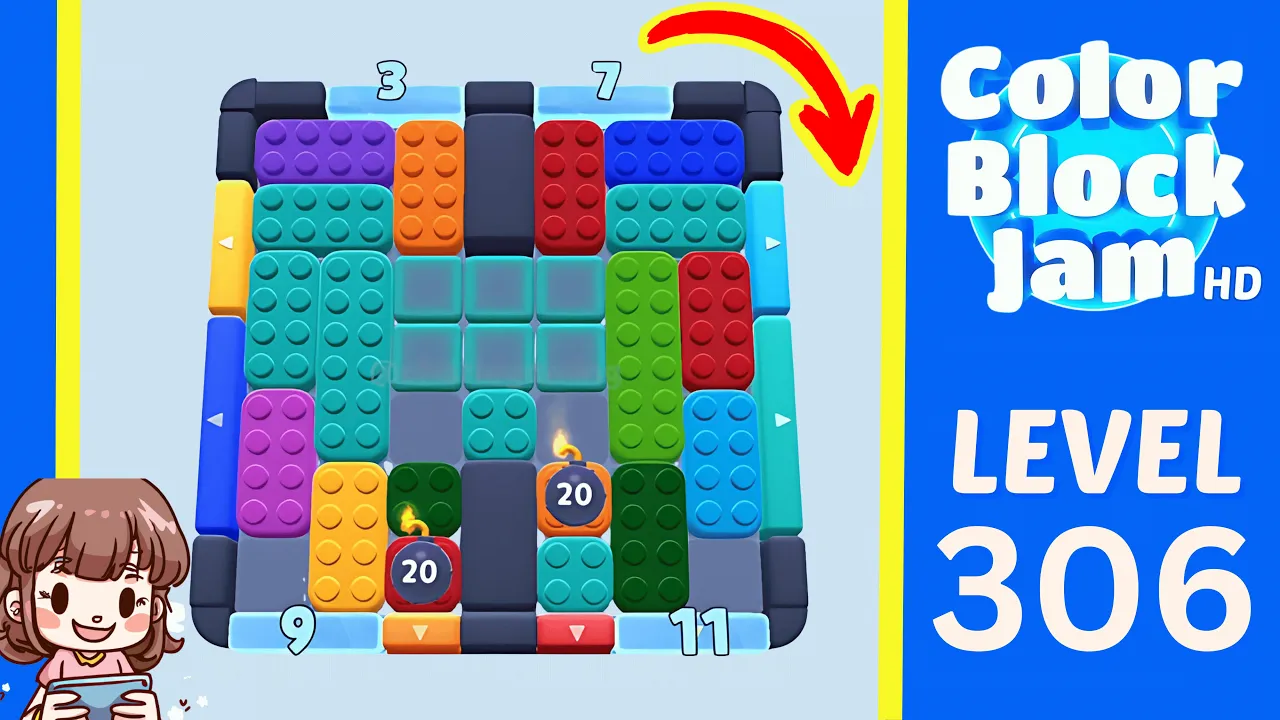
Match the 306 layout first: central translucent cyan area, top counters 3 and 7, bottom counters 9 and 11, and lower bomb pieces starting at 20. Follow the checkpoint order, keep the main lanes open, and confirm completion around 1:30.
16 timestamped steps
Use each checkpoint to confirm that your board still matches the walkthrough.
Use these moments to confirm that your board still matches before continuing.
| Time | What to confirm |
|---|---|
| 0:04 | The board opens on Level 306 with timer 1:35, top counters 3 and 7, and bottom counters 9 and 11. |
| 0:16 | At 0:16, early lower-left and center moves have reduced the counters and lower bomb numbers. |
| 0:22 | At 0:22, a lower exit clear appears and the bottom counters continue dropping. |
| 0:38 | Around 0:38, right-side aqua movement and red vertical staging are visible. |
| 1:08 | Around 1:08, purple clears through the top lane and the board is much more open. |
| 1:30 | Around 1:30, Level Complete appears with about 0:17 left. |
Checkpoint: The lower bomb pieces start at 20.
Watch at 0:04Checkpoint: The lower-center space begins opening and bomb numbers drop.
Watch at 0:10Checkpoint: Counters reduce and the lower bomb count reaches about 12.
Watch at 0:16Checkpoint: A bottom clear animation appears.
Watch at 0:22Checkpoint: The right side becomes more spacious.
Watch at 0:30Checkpoint: A right-side clear animation appears.
Watch at 0:36Checkpoint: The red block is repositioned while the right lane stays open.
Watch at 0:42Checkpoint: The left half opens and the bottom counters keep falling.
Watch at 0:48Checkpoint: The center corridor remains accessible.
Watch at 0:54Checkpoint: Space opens beneath the top-left purple and top-center orange blocks.
Watch at 1:00Checkpoint: Purple clear animation appears at the top.
Watch at 1:06Checkpoint: Bottom clearing continues while the left side stays open.
Watch at 1:12Checkpoint: The aqua block is visibly leaving the board.
Watch at 1:18Checkpoint: Blue and green clears leave only a few movable pieces.
Watch at 1:22Checkpoint: The board dims after the last move.
Watch at 1:28Checkpoint: Level Complete confirms the successful solve.
Watch at 1:30Each row links a visible gameplay fact to the walkthrough frame used to check it.
| Fact | Source role | Timestamp | Checked |
|---|---|---|---|
| The board opens on Level 306 with timer 1:35, top counters 3 and 7, and bottom counters 9 and 11. | CherieGaming walkthrough evidence | 0:04 | July 16, 2026 |
| At 0:16, early lower-left and center moves have reduced the counters and lower bomb numbers. | CherieGaming walkthrough evidence | 0:16 | July 16, 2026 |
| At 0:22, a lower exit clear appears and the bottom counters continue dropping. | CherieGaming walkthrough evidence | 0:22 | July 16, 2026 |
| Around 0:38, right-side aqua movement and red vertical staging are visible. | CherieGaming walkthrough evidence | 0:38 | July 16, 2026 |
| Around 1:08, purple clears through the top lane and the board is much more open. | CherieGaming walkthrough evidence | 1:08 | July 16, 2026 |
| Around 1:30, Level Complete appears with about 0:17 left. | CherieGaming walkthrough evidence | 1:30 | July 16, 2026 |
No. Only the Level 306 label is visible; no difficulty badge appears.
About 0:17 is visible at the completion overlay.
Yes. Replay begins around 1:36 and repeats the solution.
This guide matches Level 306 with central translucent cyan area, top counters 3 and 7, bottom counters 9 and 11, and lower bomb pieces starting at 20. If your opening board, timer, exits, or counters differ, use it only as a reference.
Wrong level?