6-and-9 top / 15-12-3 wooden-counter board
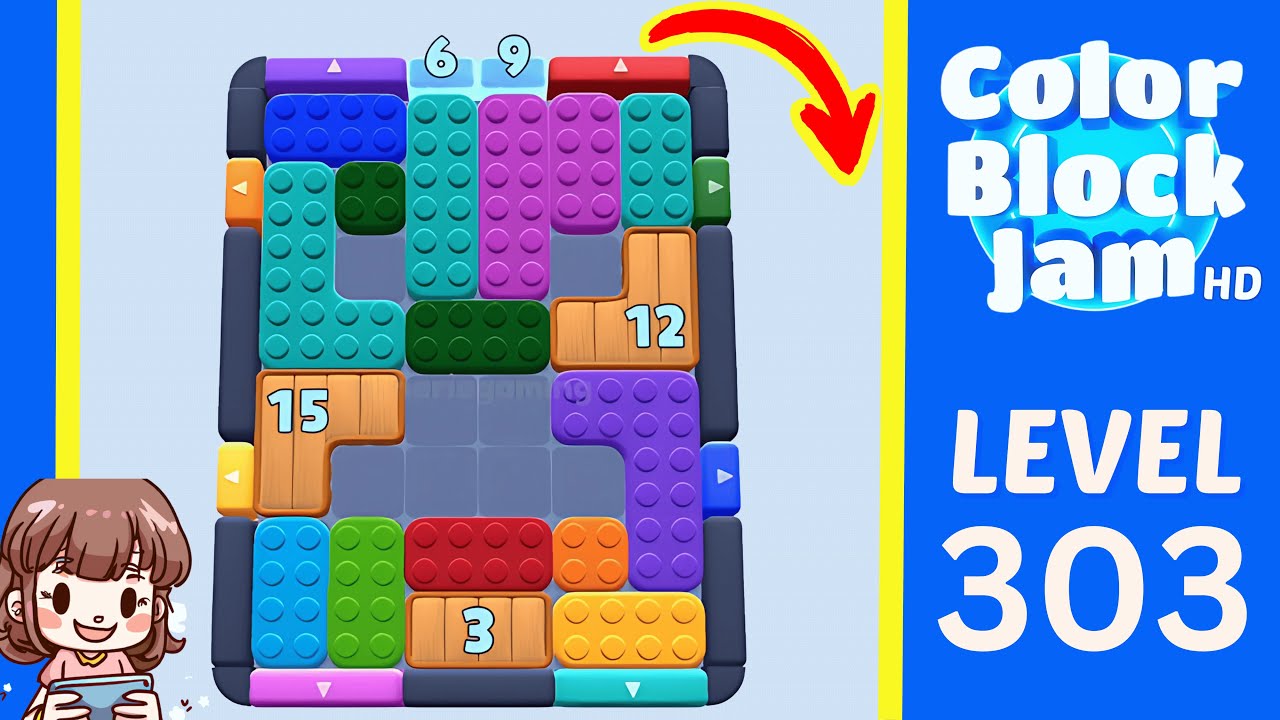
This solution matches the Level 303 board that opens with 6 and 9 above the top row, wooden counters 15 on the left, 12 on the right, and 3 at the bottom, plus a 2:10 timer. Open the central lane, keep the three wooden blocks reachable, and alternate top, side, and bottom exits so every counter continues to fall. The first run reaches the level-complete panel at about 2:09; the footage from about 2:15 is a replay.
20 timestamped steps
Use each checkpoint to confirm that your board still matches the walkthrough.
Use these moments to confirm that your board still matches before continuing.
| Time | What to confirm |
|---|---|
| 0:04 | The walkthrough opens on Level 303 with a 2:10 timer, top counters 6 and 9, and wooden counters 15, 12, and 3. |
| 0:17 | After the opening rearrangement, the counters visibly read 5 and 8 at the top and 14, 11, and 2 on the wooden blocks at about 0:17. |
| 0:30 | An orange piece clears through the left gate at about 0:30, and a purple piece clears through the bottom gate at about 0:40. |
| 0:56 | A cyan block clears through the bottom gate at about 0:56, when the top counters read 2 and 5 and the side wooden counters read 11 and 8. |
| 1:44 | The closing chain includes a red top exit at about 1:44, a green right exit at about 1:48, and a cyan top exit at about 1:52. |
| 2:09 | The board empties at about 2:08 and the level-complete panel appears at about 2:09. |
Checkpoint: A horizontal lane is open through the middle while all five counters still show their opening values.
Watch at 0:08Checkpoint: The tall magenta block stands vertically in the middle without covering either wooden side counter.
Watch at 0:12Checkpoint: The counters read 5 and 8 at the top and 14, 11, and 2 on the wooden blocks at about 0:17.
Watch at 0:17Checkpoint: The left orange gate row is open and the small orange piece can reach it without crossing the counter blocks.
Watch at 0:24Checkpoint: Orange particles appear at about 0:30 and the counters read 4, 7, 13, 10, and 1.
Watch at 0:30Checkpoint: The magenta piece is centered over the purple gate and the bottom wooden counter has reached 1.
Watch at 0:36Checkpoint: Purple particles appear below the board at about 0:40; the remaining counters read 3, 6, 12, and 9.
Watch at 0:40Checkpoint: The cyan piece has a straight route to the cyan bottom gate and the left cluster remains clear of that column.
Watch at 0:48Checkpoint: Cyan clears at about 0:56 while the remaining counters visibly read 2, 5, 11, and 8.
Watch at 0:56Checkpoint: The center and lower-right lanes are open for the tall purple and cyan pieces.
Watch at 1:04Checkpoint: The magenta block occupies the upper center while both wooden side counters remain accessible.
Watch at 1:12Checkpoint: The upper-left cluster is compact and the middle row is open from the left counter to the right side.
Watch at 1:20Checkpoint: The yellow block sits between the two side counters and can move away without sealing either side gate.
Watch at 1:28Checkpoint: The red block can travel upward toward the red top gate as the remaining counters continue to fall.
Watch at 1:36Checkpoint: Red particles appear above the board at about 1:44 and the right wooden counter reads 5.
Watch at 1:44Checkpoint: The green exit completes at about 1:48 and cyan particles appear above the board at about 1:52.
Watch at 1:52Checkpoint: The upper half is mostly empty and the two wooden side counters are the main remaining obstacles.
Watch at 2:00Checkpoint: Both numbered wooden blocks have cleared and only the last colored and gray pieces remain near the bottom.
Watch at 2:04Checkpoint: The board is empty at about 2:08 and no booster has been used.
Watch at 2:08Checkpoint: The level-complete panel appears at about 2:09.
Watch at 2:09Each row links a visible gameplay fact to the walkthrough frame used to check it.
| Fact | Source role | Timestamp | Checked |
|---|---|---|---|
| The walkthrough opens on Level 303 with a 2:10 timer, top counters 6 and 9, and wooden counters 15, 12, and 3. | CherieGaming walkthrough evidence | 0:04 | July 15, 2026 |
| After the opening rearrangement, the counters visibly read 5 and 8 at the top and 14, 11, and 2 on the wooden blocks at about 0:17. | CherieGaming walkthrough evidence | 0:17 | July 15, 2026 |
| An orange piece clears through the left gate at about 0:30, and a purple piece clears through the bottom gate at about 0:40. | CherieGaming walkthrough evidence | 0:30 | July 15, 2026 |
| An orange piece clears through the left gate at about 0:30, and a purple piece clears through the bottom gate at about 0:40. | CherieGaming walkthrough evidence | 0:40 | July 15, 2026 |
| A cyan block clears through the bottom gate at about 0:56, when the top counters read 2 and 5 and the side wooden counters read 11 and 8. | CherieGaming walkthrough evidence | 0:56 | July 15, 2026 |
| The closing chain includes a red top exit at about 1:44, a green right exit at about 1:48, and a cyan top exit at about 1:52. | CherieGaming walkthrough evidence | 1:44 | July 15, 2026 |
| The closing chain includes a red top exit at about 1:44, a green right exit at about 1:48, and a cyan top exit at about 1:52. | CherieGaming walkthrough evidence | 1:52 | July 15, 2026 |
| The board empties at about 2:08 and the level-complete panel appears at about 2:09. | CherieGaming walkthrough evidence | 2:09 | July 15, 2026 |
It covers the board with top counters 6 and 9, wooden counters 15, 12, and 3, and a 2:10 opening timer.
The board empties at about 2:08 and the level-complete panel appears at about 2:09.
No. The visible boosters remain unused during the first completed run; the footage beginning at about 2:15 is a Replay.
This walkthrough matches the Level 303 board with top counters 6 and 9, wooden counters 15 on the left, 12 on the right, and 3 at the bottom, plus a 2:10 opening timer. If your counters, pieces, or gate positions differ, use the Wrong Level tool instead of forcing this sequence.
Wrong level?