Level 175 board with top counters 10 and 15, central bomb counters 16 and 19, and cyan slider pieces occupying the middle/bottom lane
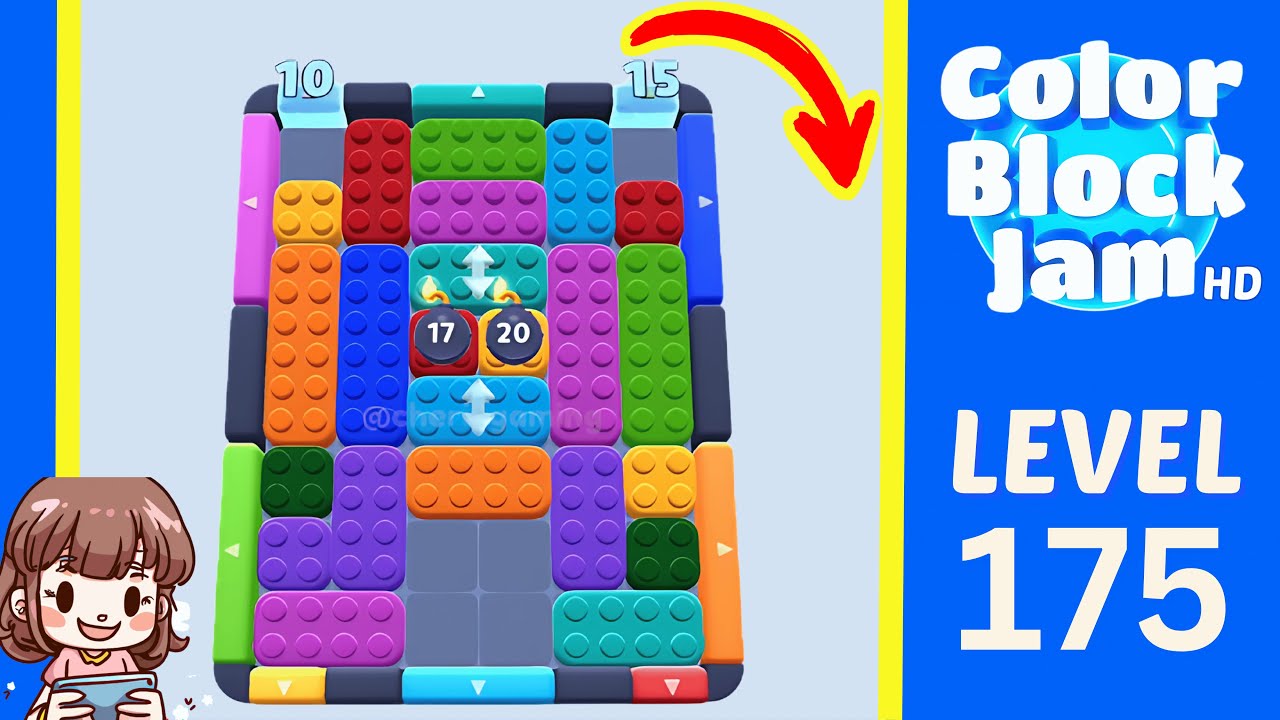
Open the middle corridor early, because the central counters and cyan slider area control the rest of the board. The source clears lower-right orange traffic, keeps cyan bottom access available, then routes the last purple, green, yellow, and cyan pieces. The first completion is visible around 1:40.
10 timestamped steps
Use each checkpoint to confirm that your board still matches the walkthrough.
Use these moments to confirm that your board still matches before continuing.
| Time | What to confirm |
|---|---|
| 0:10 | Level 175 is visible with a 1:34 timer, top counters 10 and 15, and central counters 16 and 19. |
| 0:20 | By 0:20, lower-right orange traffic is clearing and the top counters reduce to 9 and 14. |
| 0:40 | Around 0:40, the central vertical lane is open and counters show about 5 and 10. |
| 1:00 | Around 1:00, the right half is mostly open while the remaining cluster is left, center, and bottom. |
| 1:20 | Around 1:20, only a small set of pieces remains and the visible right/top counter is near 2. |
| 1:40 | Level Complete is visible around 1:40 with about 0:10 shown behind the overlay. |
Checkpoint: The central cyan slider pieces occupy the middle lane.
Watch at 0:10Checkpoint: The top counters reduce to about 9 and 14.
Watch at 0:20Checkpoint: The counters are near 6 and 11 and side lanes have more room.
Watch at 0:30Checkpoint: A large central empty lane is visible.
Watch at 0:40Checkpoint: The cyan slider remains movable near the bottom center.
Watch at 0:50Checkpoint: Counters are near 3 and 8.
Watch at 1:00Checkpoint: Only a few clusters remain.
Watch at 1:10Checkpoint: The visible counter is near 2.
Watch at 1:20Checkpoint: Only a few final pieces remain.
Watch at 1:30Checkpoint: Level Complete appears before the replay begins.
Watch at 1:40Each row links a visible gameplay fact to the walkthrough frame used to check it.
| Fact | Source role | Timestamp | Checked |
|---|---|---|---|
| Level 175 is visible with a 1:34 timer, top counters 10 and 15, and central counters 16 and 19. | CherieGaming walkthrough evidence | 0:10 | July 16, 2026 |
| By 0:20, lower-right orange traffic is clearing and the top counters reduce to 9 and 14. | CherieGaming walkthrough evidence | 0:20 | July 16, 2026 |
| Around 0:40, the central vertical lane is open and counters show about 5 and 10. | CherieGaming walkthrough evidence | 0:40 | July 16, 2026 |
| Around 1:00, the right half is mostly open while the remaining cluster is left, center, and bottom. | CherieGaming walkthrough evidence | 1:00 | July 16, 2026 |
| Around 1:20, only a small set of pieces remains and the visible right/top counter is near 2. | CherieGaming walkthrough evidence | 1:20 | July 16, 2026 |
| Level Complete is visible around 1:40 with about 0:10 shown behind the overlay. | CherieGaming walkthrough evidence | 1:40 | July 16, 2026 |
Yes. Level 175 is visible during both the first solve and replay.
No visible Hard or Very Hard badge appears in the reviewed frames.
No visible booster use is shown; the solve appears to rely on normal block movement.
This guide matches Level 175 with Level 175 board with top counters 10 and 15, central bomb counters 16 and 19, and cyan slider pieces occupying the middle/bottom lane. If your opening board, timer, exits, or counters differ, use it only as a reference.
Wrong level?